An ideal tennis warm up session includes coordination drills in addition to increasing body temperature and getting physically ready to play tennis.
Performing coordination drills at the beginning of a tennis practice session helps the player optimize their movements and refresh their mind on how to move more efficiently around the court.
The following video article shows you general forehand and backhand warm up coordination drills with many variations that I have been using for quite a while with my students with very good success.
What Is Coordination?
If you look up the definition of coordination, you'll see something like this: "the organization of the different elements of a complex body or activity so as to enable them to work together effectively” and “the ability to use different parts of the body together smoothly and efficiently."

Simple definition of coordination that helps us understand how it can be applied to tennis...
In tennis, we have to “organize” body parts quickly and efficiently since we always have limited time. The better this “organization” or “coordination” is, the more smoothly and efficiently the player will move and execute their stroke, which allows for more power and better stroke control.
One of the biggest problems in recreational level tennis is preparing the stroke too late and hitting the ball late.
The usual instruction is to “prepare early,” but that doesn't usually work. Most adult recreational tennis players can't coordinate early due to many different footwork patterns as they move around the court.

What do you think works better: being told to "prepare early" or doing coordination drills in the warm up session regularly?
That's why warm up coordination drills are so useful. You will move through 4 major directions: forward, backward, left and right while simulating the stroke.
You will not use the racket in the usual way, as that would trigger your ingrained habits.
Instead, you will either use the racket by holding it in two hands, or you will use different balls and other tools to help you feel certain parts of the stroke execution better.
One more thing: all these drills are based on the Universal swing movement that I have shown before where the player swings both arms in a continuous figure 8 pattern.
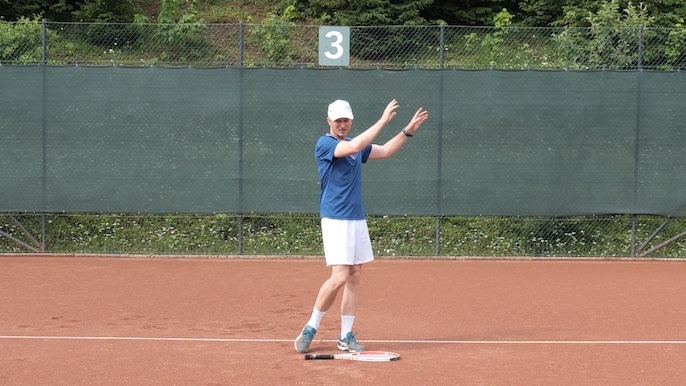
The nr 8 swing shape with both arms is the foundation of all coordination drills.
This swing pattern works for the forehand and the two-handed backhand, while the one-handed has a slightly different pattern.
These drills are ideally suited for the two-handed backhand and especially the open stance forehand, which poses so many problems for recreational tennis players.
Variation #1 – Holding The Racket With Both Hands
In the first variation of warm up coordination drills, you'll hold the racket with both hands at each end.
That helps you connect your upper body and arms well and helps you feel upper body as one unit in relation to the lower body.
a) Moving forward
First, begin moving the racket and your arms in the figure 8 swing pattern to get into a rhythm. Then, you will start moving forward with one step.
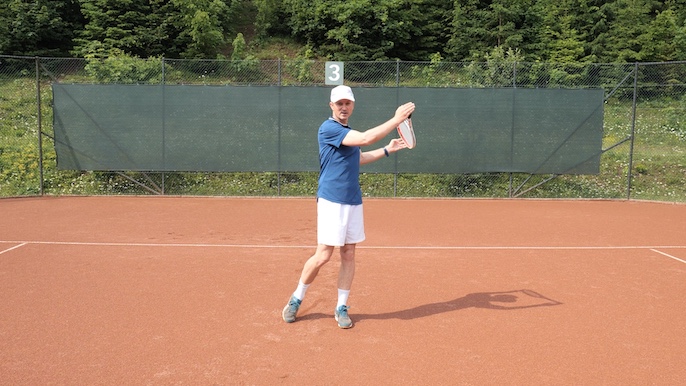
Focus on keeping the swing going and holding balance well...
These keys to moving forward apply to all variations:
Hold your balance on your front foot until you have reached your left hip (for right-handers) with the swing.
Drag your back foot on the tip as you pull your hip forward during the forward swing (you can imagine that your shoe is tied with a string to the racket).
Keep your head straight and fix your gaze on an object far ahead of you.
Exhale as you swing forward and inhale on your backswing.
Start from the baseline and move forward step by step until you reach the net.
b) Moving backward
To move backward efficiently and coordinate the upper body well, you need to turn your upper body and step back at the same time.
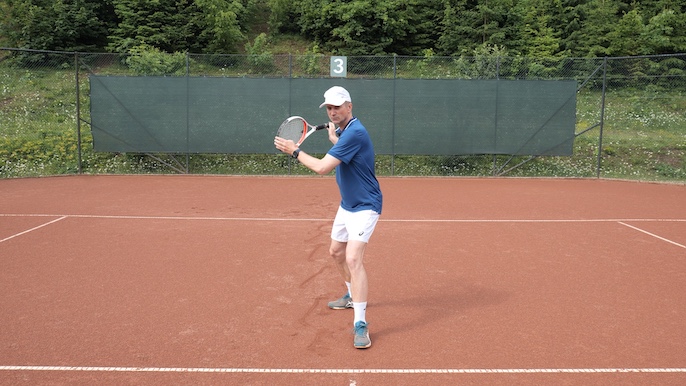
The key to moving backward well is to turn and step back at the same time.
After that, rotate on your back foot and bring your front foot behind your back foot. You'll be turning your body close to 180 degrees while you do that.
The keys to moving backward are as follows:
Keep your head straight and your eyes fixed on an object like before.
Keep a slightly forward-leaning posture as you spin around for good balance.
Maintain a correct breathing pattern as described above.
Perform this pattern moving all the way from the net to the baseline.
I suggest 3-4 sets for all directions of movement.
c) Moving to the right (for right-handers)
We'll focus on the open stance forehand footwork combinations because they performed much worse than neutral stances at the recreational tennis level.

The upper body turn and the step happen at the same time...
We have two options:
One step:
- Step out with your right leg while turning your upper body 90 degrees.
- Keep your balance on your right leg and keep your legs apart as you turn your upper body close to 180 degrees to simulate the stroke.
- The left leg tends to be pulled toward the right leg. Don't let it; keep your feet apart.
- Only once you've completed the stroke can you can “reset” your feet. Step closer together, as that allows you to make another big step to the side to start another repetition.
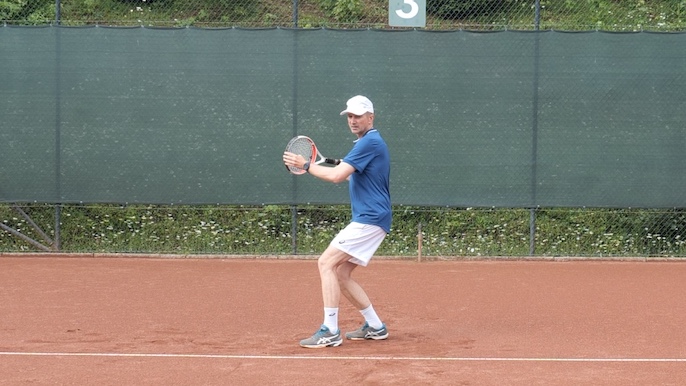
When moving with 2 steps, you again turn and make the first step at the same time.
Two steps:
This time, start with your left foot in a crossover step.
Turn your upper body at the same time as you crossover.
Add another step with your right foot to end up in the open stance forehand while maintaining the upper body turn.
Execute the stroke as above, and don't let your left foot be pulled toward your right foot.
As in the previous examples, I suggest you perform 3-4 sets of movements for each footwork pattern.
d) Moving to the left (for right-handers)
Moving to the left can be done only with 2 steps. This footwork pattern is used when the ball flies right at the player and they need to get out of the way or when they want to run around the backhand to hit a forehand.
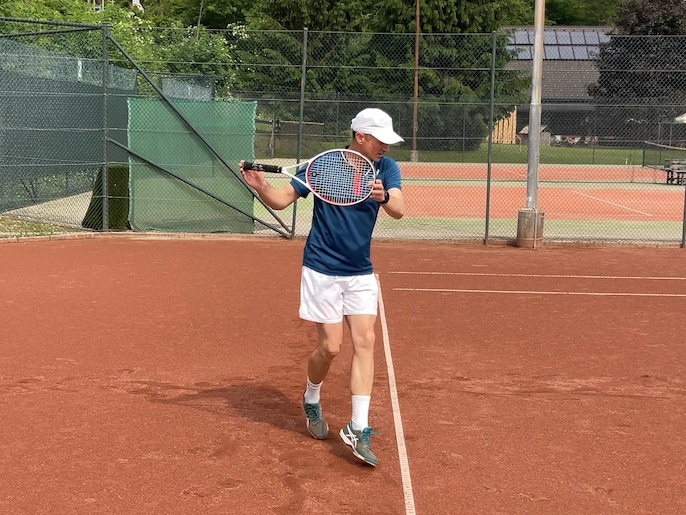
Moving to the left has to be done dynamically and with two steps.
The keys to moving to the left are below:
Start with a couple of pivots back and forth first to feel how to step back and to the left with your right foot while turning your upper body. Most players are not coordinated well enough to find this move intuitively while playing; therefore, they need to consciously learn it.
After 6-8 pivots, add one more step with your left foot stepping more to the left so that you end up in the open stance and then execute the stroke.
Make sure you feel well balanced and calm at the end of the stroke on the left leg.
You can pull your right leg slightly toward your left as you execute the stroke.
“Reset” your feet after the stroke; namely, pull them closer together so that you can get ready for the next repetition.
e) Combinations
Once you are bit a more comfortable with these footwork patterns (this could be after 3-5 sessions), you can challenge yourself with combinations of movement.

Try forward - backward combo with 1 and with 2 stroke sequences.
Perform the forward–backward combination a few times, where you can choose either only one step in each direction or two steps in each direction before changing directions.
For left–right combinations, you will always use two steps.
For example, you will do two steps to the right to simulate an open stance forehand and two steps to the left immediately after that to simulate getting out of the way and hitting an open stance forehand again.

If you can do this movement drill smoothly, you're ready for anything! 😉
Variation #2 – Medicine Ball (2 kg / 3 pounds)
Now that you're familiar with how to execute the coordination and footwork patterns in all directions, we can look at variations of doing these warm up drills.
Variations are important to prevent boredom 😉 and to emphasize and activate different parts of the stroke or get different feels of the stroke with each new training aid.
The 2 kg medicine ball is very useful for engaging bigger muscle groups like legs, core, and upper body. It also helps to stabilize and firm up the chest muscles, which are the key to connecting both arms together when hitting forehands.
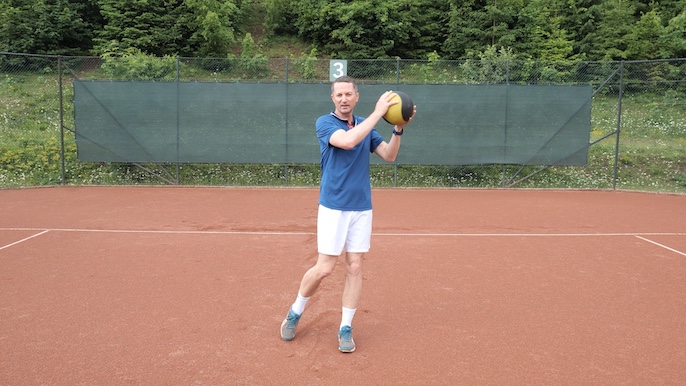
The 2kg medicine ball is just the right weight to still allow for some swinging.
Variation #3 – Baseball Training Balls (450 grams / 16 oz)
The baseball training balls are extra heavy compared to normal baseballs in order to help baseball players engage more of their body into the throw.
They are also fantastic tools in tennis to encourage swinging and engaging the non-dominant arm.

The 16 oz / 450 grams is ideal weight for feeling a really good swing using a single arm.
While the medicine ball is great for engaging big muscle groups, it does not give you a good swinging feel. That's why it's good to vary the training aids in these warm up coordination drills because each complements another.
Use two baseball training balls, one in each hand, and swing them in the now familiar figure 8 shape while you perform all the warm up footwork patterns.
Variation #4 – Pick Up Tube Across The Chest
If you have the pick up tube, you can use in two ways for warm up coordination drills.
The first one is to hold it across your chest with both arms. That will really help you become much more aware of how much you're turning your upper body in preparation and follow-through.

While there is no real sensation of swinging here, the player feels shoulder rotation well.
That's because you'll see the ends of the tube with your peripheral vision.
Tennis players often do not turn enough when they are preparing for the stroke, and this drill can help them become aware of that mistake and correct it.
Variation #5 – Swinging The Pick Up Tube
The pick up tube is also a great swinging tool because it's relatively heavy and long.
You can perform all the footwork patterns described in this article while swinging the tube to simulate a forehand or a two-handed backhand.
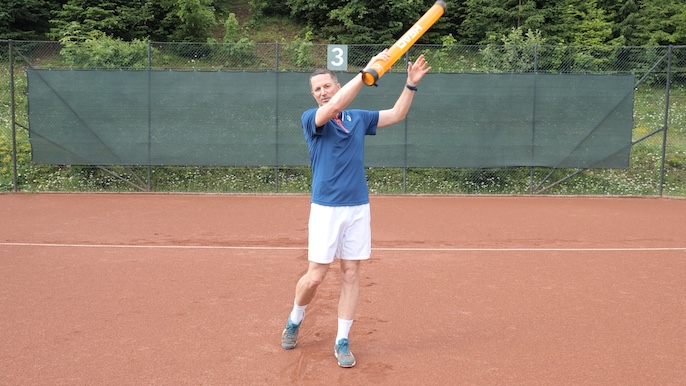
Swinging the tube is one of my favorite drills also for general stroke correction.
The long and heavy tube helps correct jerky movements and short follow-throughs because it has a lot of inertia when you swing it, which helps you feel the swing path.
It also helps with poor wrist lag since it's heavy enough to really pull your wrist back into the fully laid back position.
Variation #6 – Swinging And Throwing Tennis Balls
Hold 2-3 tennis balls in your non-dominant hand and one ball in your dominant hand.
Perform the coordination and footwork drills while keeping the usual figure 8 swing shape and doing an underarm throw of the ball when you swing forward.
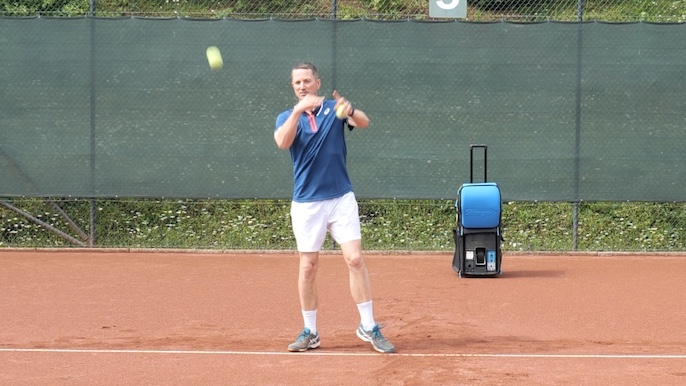
The underarm tennis ball throw is a wonderful drill for getting the right feel for tennis strokes.
Get the next ball into your throwing hand in the follow-through position above the shoulder and continue the footwork patterns and the figure 8 swing shape.
Throwing tennis balls is a great way to immediately give the player a sensation of swinging and helping them relax the hitting arm, which tends to tense up so often in recreational tennis.
Variation #7 – Using WearBands
I've reviewed the WearBands device before, so follow the link to learn more about WearBands if you haven't come across them.
WearBands uses elastic bands to provide resistance to your arms, which gives you a similar benefit to holding a medicine ball.
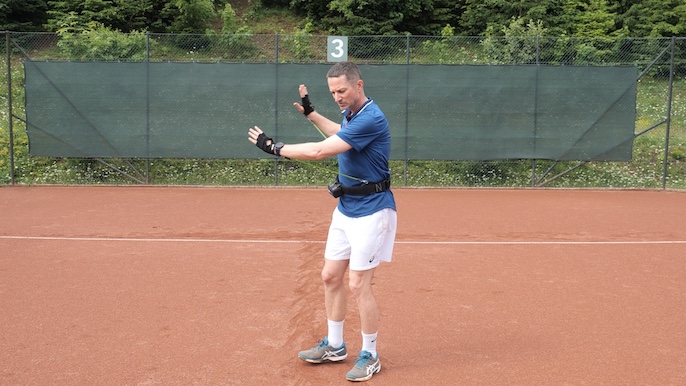
If you have Wearbands or a similar training aid, try it with these drills, there's always some new benefit.
The resistance bands force you to engage your arm and upper body muscles more, and that helps with overall better connection and coordination of both arms, especially on the forehand stroke.
Using WearBands for a few minutes may make the player a little bit tight, so I like to follow up with throwing tennis balls to refresh the feel of swinging in the player's mind and body.
Summary
The usual tennis tip of preparing the stroke early may be theoretically correct, as players do prepare too late in many cases, but it simply doesn't work.
It doesn't work because the player needs to coordinate early preparation with different footwork patterns depending on which direction they are moving.
In most cases, adult recreational tennis players do not intuitively find that coordination by themselves.
Therefore, I propose a different approach that has proven to work very well and very fast: have tennis players perform a warm up where they go through a sequence of movements that coordinates early preparation with each of the most common footwork patterns.

Perform coordination drills with various tools and balls regularly and I am certain you'll move more efficiently and hit more effortlessly.
That way, they are not only warming up (which most players don't do!), but they are also learning the right sequence and combinations of movements that will be needed later once they start playing with a live ball.
I highly recommend you implement these tennis warm up coordination drills into your tennis sessions, as even just 5 minutes of these drills performed regularly makes a big difference in efficiency and smoothness of movement and stroke execution.

