How should you structure a tennis serve lesson for beginners?
We all know that we cannot learn an advanced tennis serve technique in one lesson so we need a long term plan that includes a lesson structure with various drills.
This guide offers a structured approach to learning the serve showing you an example of a beginner lesson structure with fundamental serve drills.
5 Part Beginner Lesson Structure
The following drills help you develop many fundamentals of the serve that a tennis beginner needs to develop a more advanced technique like the toss accuracy, throwing mechanics, relaxed arm, full body engagement, pronation and internal shoulder rotation.
Step 1: Warming Up the Serve with Throwing Drills
The first drill serves as a warm-up and preparation for the more physically demanding drills. It also helps you work on your throwing mechanics, including the accuracy of your toss.
Hold a ball in each hand and start with both arms in front of you, with your hands close together so that the balls are touching each other.
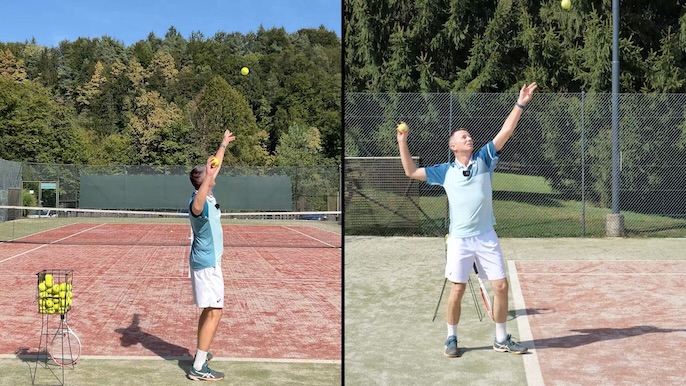
Toss the ball vertically while swinging back with the other arm as you prepare to throw the ball.
Now gently swing both arms backwards and then use your non-dominant arm to toss the ball vertically up while you simultaneously swing the dominant arm back and then proceed to throw the ball forward.
In other words, you are using the non-dominant arm to toss while you use the dominant arm to throw.
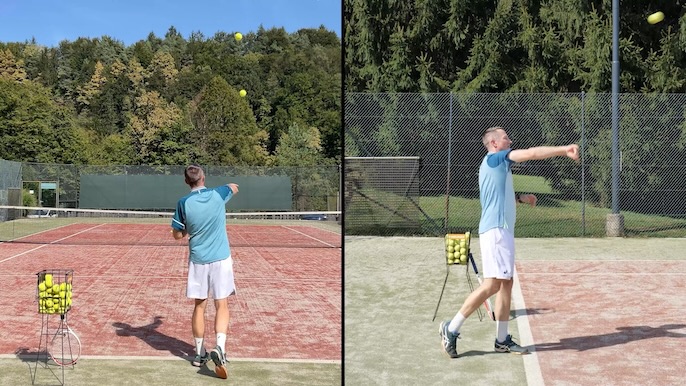
After you’ve thrown the first ball up, now throw the second ball as far forward as you can.
This is the foundation of the serve as you are learning how to coordinate both arms and teach each arm its role.
Repeat this drill 20-30 times, focusing on coordinating your arm movements.
As you progress, pay attention to:
- Toss accuracy: Aim to land the toss within a small square on the ground. You can mark this square with tape or draw it on the court.
- Balance: Maintain your balance throughout the toss and throw motion. Avoid leaning or stumbling.
Step 2: Getting Used To The Continental Grip
The Continental grip feels very awkward at first as every tennis beginner learns to serve with a forehand grip which feels more natural to them.
But if you’re serious about learning a more advanced tennis serve technique, then the Continental grip is a must.
Here’s how the drill works:
- Hold the racket with a continental grip, choking up towards the throat of the racket.
- Gently tap a ball downwards, keeping the racket face parallel to your body.
- Repeat this for 2-3 minutes while trying to keep the ball in play.
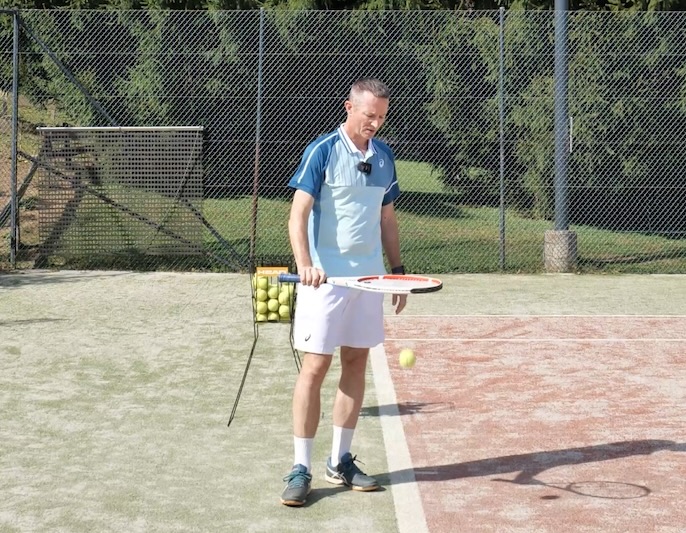
Make sure the racket is angled paralel to your body and not away from you.
The more often you practice, the more skilled you will be in controlling the ball and the more used you will get to the Continental grip.
Remember, transitioning to the Continental grip takes time. Be patient and keep practicing!
It might take 3-6 months to feel fully comfortable, but the benefits are well worth the effort.
Step 3 - Mastering The Pronation
Pronation in combination with the internal shoulder rotation generates a lot of power on the serve once you master the movements and strengthen your arm.
Since pronation is a very unusual movement that we don’t really do in our daily life, you need to start very gently with the following drill or variations of it as your arm is not used to this type of movement.
If you force the movements too hard (because you want to hit the ball hard), then you’ll likely get a sore arm afterwards or even injure yourself.
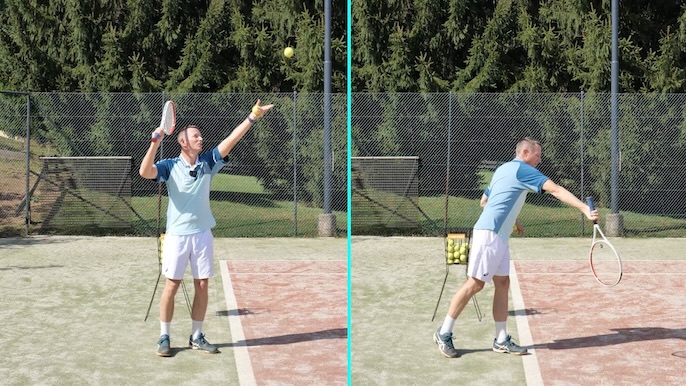
Focus on executing the pronation drills correctly rather than immediately looking for power.
Here's a simple pronation drill to get you started:
- Hold the racket with a continental grip, choking up on the handle.
- Prepare the racket above your shoulder as if you are about to hit downwards with a hammer. Align the edge of the racket downwards.
- Toss the ball and let it bounce.
- Gently hit the ball into the ground as you pronate, keeping the racket on your dominant side as you finish.
Repeat this for 30-50 repetitions, focusing on a controlled and deliberate pronation motion.
Avoid simply whacking the ball. The goal is to train your arm to pronate correctly.
Step 4: Swinging Drills for Fluidity and Smoothness
Swinging drills help develop the fluidity and smoothness necessary for a powerful serve. These drills focus on the rhythm and coordination of your swing.
Here's a classic swinging drill:
- Hold the racket with three fingers at the very end of the handle.
- Swing the racket in smooth, continuous figure-eight loops.

Swinging drills with the racket or other training aids are the foundation of serve development.
Focus on these key points:
- Rotate your body throughout the swing, ensuring you're not staying sideways.
- Engage your core and lift your heel as you swing, promoting proper body rotation.
- Maintain a relaxed and fluid motion.
One of the keys of an effortless tennis serve is a fluid coordination of all body parts involved in the service action, and swinging drills like this one help you coordinate the body much better in the long term.
Step 5: Putting The Serve Together
Now it's time to combine all the elements you've practiced into a complete serve.
Realize that the serve action and technique will not be correct nor smooth yet, but the goal is to keep guiding the body in the direction of a complete serve; the technique will refine over time.

Toss and prepare the swing, catch the ball and toss it again and complete the serve.
Here’s the “serve in two parts” drill:
- Toss the ball and catch it, checking your trophy position (the point where you hold the ball before tossing).
- Repeat the toss and this time, execute your serve motion.
This breakdown allows you to practice your toss, balance, and timing without the pressure of hitting the ball perfectly. As you get comfortable, gradually transition to a full serve motion.
Summary
Hopefully, this structure of a serve lesson for tennis beginners makes more sense now as you’ve read through it or even practiced it for the first time.
Follow this structure in your future serve practice sessions as you find more drills from me or from other coaches since now you know where each drill type fits into the lesson.
And if you would like to continue working on your serve under my guidance, then I invite you to sign up for the free 30-Day Serve Challenge where I have recorded 10 sessions of 30-minute drills following the same structure that I outlined above.
You will also join a community of over 500+ players working on their serves and supporting each other on their journey.


